Table of Contents
The Falklands War began with an Argentine invasion of the Falkland Islands a small archipelago of British territory situated off the southern coast of Argentina in early 1982. Britain had occupied the islands since 1833, displacing a small Argentine garrison, and Argentina had never accepted that act as legitimate, maintaining a historical grievance and sovereignty claim ever since.
This grievance had never been acted on until the early 1980s, Argentina’s ruling military junta saw an opportunity to exploit that grievance. The regime, led by General Leopoldo Galtieri, was facing severe domestic unrest and economic turmoil, and saw the seizure of the Falkland as a means of uniting the country behind the government through nationalist fervour.
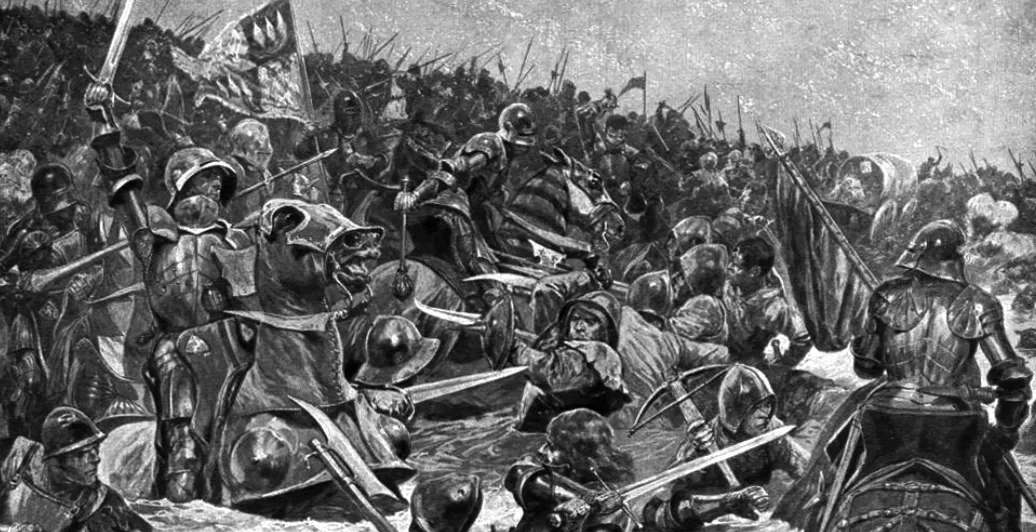
The invasion did not come without warning signs the British government for year attempted negotiation and reason to no prevail. In the years preceding 1982, Argentina had made several aggressive incursions onto remote British-administered islands in the South Atlantic, including the illegal occupation of Southern Thule in 1976 and the scrap metal workers’ provocation at Leith Harbour, South Georgia, in March 1982. Each time, Britain’s response had been muted. The Argentines were emboldened by the is inaction which was compounded by the announced significant cuts to the Royal Navy, including the planned withdrawal of HMS Endurance the Navy’s only permanently stationed vessel in the South Atlantic which Argentine planners read as a signal of declining British interest and resolve. Emboldened by the land grabs nationalistic fever and a declining British empire Argentina launched its assault, fundamentally miscalculating British Resolve and ability, as had been done years earlier in world war 2. The British launched a daring 8000km away attack to eventually push the invaders of the island.

The Timeline of the War
By late march of 1982 Argentina had decided to forcefully seize the islands, essentially declaring war on Britain. This was first started on 28th of March, where a large Argentine naval task force put to sea from Puerto Belgrano Naval Base and started to head suspiciously southward toward the Falkland Islands, this point, unknown to Britain, Argentina had already made the decision to invade. The task force comprised 7 warships including the aircraft carrier ARA Veinticinco de Mayo, numerous naval transports, and landing craft a substantial deployment. In an irony of arms trading, several of the Argentine warships were British-built Type 42 destroyers, the same class as HMS Sheffield and HMS Coventry which they would later engage.
After just a day of the future invading forces deployment, Britain noticed something was up after detecting the fleet’s movement but initially refrained from military interception, instead pressing the United States to use its influence to halt the Argentine operation. Washington declined. Britain decided it would have to defend the islands alone, knowing what was coming and started moving quickly on other fronts: three nuclear submarines, HMS Spartan, HMS Splendid, and HMS Conqueror were immediately dispatched south. The small Royal Marine garrison on the Falklands, Naval Party 8901, was placed on full alert. HMS Endurance, the Navy’s sole vessel in the region, was also ordered to make best speed back towards the islands sailing entirely alone, the invasion was coming and Britain knew it.
By the 1st of April, the Argentine naval task force was in position east of the Falklands and was ready to launch their assault.

The Argentine Invasion 2 April 1982
In the late hours of 2 April 1982, Argentine warships dropped anchor east of the Falklands and launched rubber assault craft carrying elite Buzo Tactico naval combat divers. The marines came ashore at Mullet Creek shortly before midnight, beginning the Argentinan invasion plan called Operation ROSARIO. From there they marched approximately 6 kilometres north towards Moody Brook Barracks where a garrison of around 68 Royal Marines was expected to be asleep, to be killed or captured before an alarm could be raised.
They found the barracks empty. Major Mike Norman, commanding Naval Party 8901, had received intelligence of the imminent invasion and moved his men to prepared fighting positions across Stanley during the night. The Argentine commandos shot up and grenaded vacant dormitory rooms had the Marines still been in their beds, it would have been a massacre. The Argentine marines, finding nothing at Moody Brook, then attempted to advance into Stanley itself, where they quickly foudn where the marine contingent had gone when they were met with fierce resistance from the entrenched Royal Marines. A sustained gun battle broke out across multiple positions in and around the capital, with the heaviest fighting centred on Government House, where roughly 30 Marines and Falkland Islands Defence Force (FIDF) volunteers had fortified the Governor’s residence.

Simultaneously, a larger Argentine amphibious force including approximately 20 LVTP-7 armoured amphibious vehicles landed west of Stanley near the airport. This armoured column attempted to push east towards Stanley to support the initial assault, but was ambushed near a narrow landmass known as the Neck by Royal Marine detachments armed with anti-tank weapons and small arms. The Marines inflicted casualties and delayed the column before being forced to fall back into Stanley, repositioning around Government House as the Argentine encirclement began to close.
The fighting around Government House lasted approximately three hours. Argentine Captain Pedro Giachino, leading one assault element, was shot and killed attempting to breach the perimeter becoming the first Argentine fatality of the war and later posthumously awarded Argentina’s highest military honour. The Marines fired an estimated 6,000 rounds during the engagement. Eventually, outgunned and surrounded, with Argentine reinforcements pouring ashore and the position clearly untenable, Major Norman advised Governor Rex Hunt that further resistance would result only in unnecessary deaths. Hunt who had twice refused Argentine demands to surrender reluctantly agreed. At approximately 09:15 on 2 April, the Falkland Islands formally fell into Argentine hands.

British casualties in the battle: zero killed, three wounded. Argentine casualties: at least 1 killed (Captain Giachino) and approximately 5–10 wounded. By the afternoon, Argentine forces were being flown in through Stanley Airport to consolidate the occupation.
Britain’s Response The Task Force
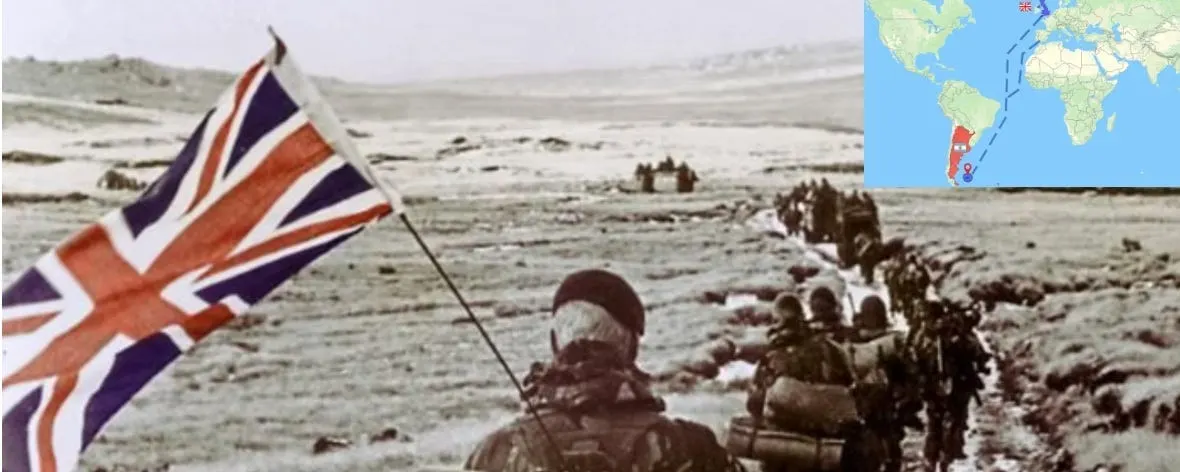
News of the invasion reached London to a reaction of outrage and in government considerable shock. Prime Minister Margaret Thatcher immediately announced the assembly of a naval task force to retake the islands. The Royal Navy already had a significant formation at sea near Gibraltar conducting exercises Task Force 317 comprising 10 warships and a tanker, and it was immediately redirected south.
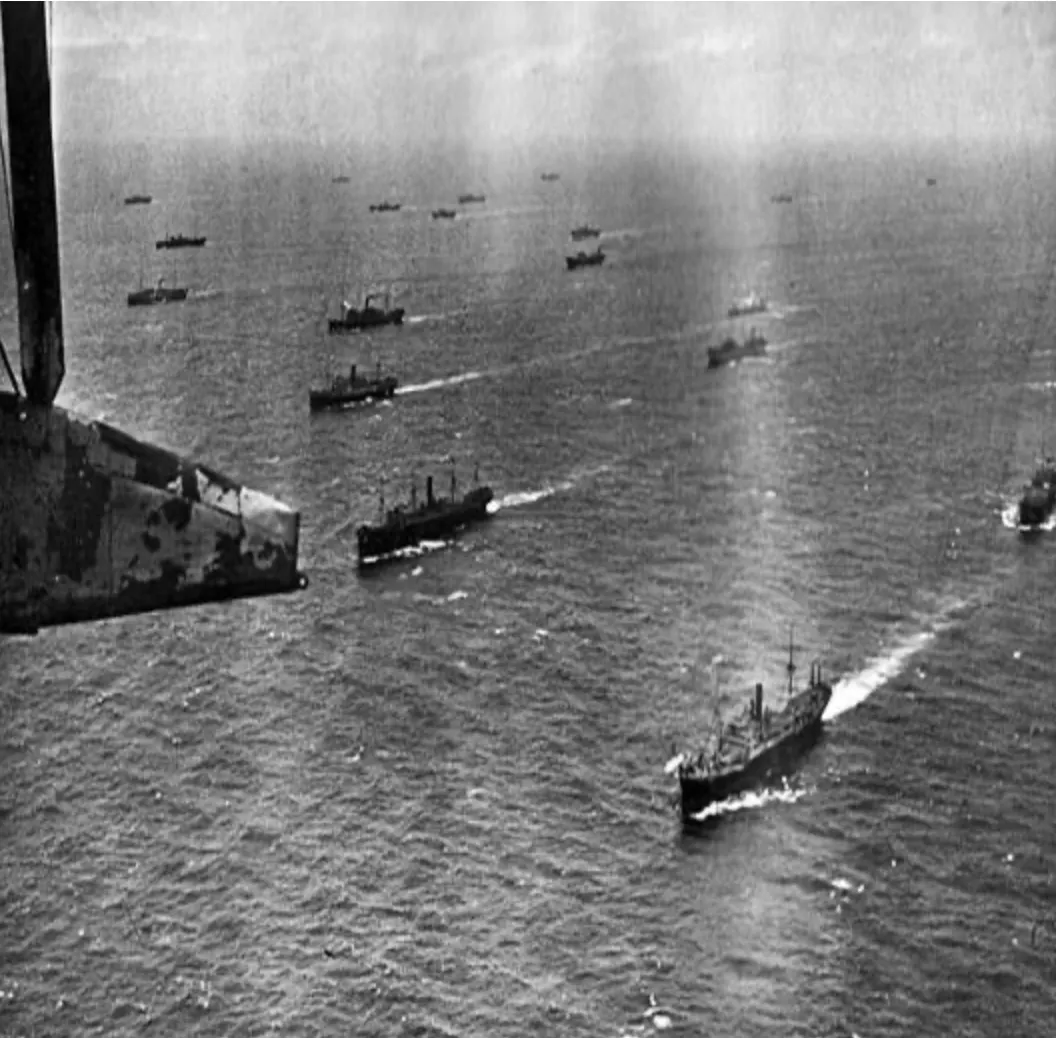
Britain rapidly set about requisitioning large civilian cargo ships and ocean liners to supply what would become an extraordinary 8,000-mile logistics chain and to transport thousands of paratroopers and Royal Marines to the South Atlantic. The ocean liner SS Canberra alone carried over 3,000 troops. By the end of April, more than 60 ships were en route to the Falklands over 40 of them requisitioned civilian vessels, alongside more than 20 warships carrying troops, aircraft, ammunition, and supplies. All were heading first to Ascension Island, the nearest British territory capable of supporting such a force, where they were covertly resupplied with considerable assistance from American logistical support at RAF Wideawake airfield, despite Washington’s official position of neutrality.

The goal had become clear deploy significant naval forces and ground troops south and recapture the Falkland and South Georgia island chains from Argentinian control.
Once these forces had consolidated as Ascension Island two carriers from Britain linking up with their real navy destroyer and frigate escorts, On 18 April, two task groups departed Ascension Island. The smaller force headed for South Georgia, seized by Argentina during its earlier provocations. It comprised three warships and a transport ship carrying Royal Marine commandos and a detachment of D Squadron, 22 SAS. HMS Endurance, which had been at sea since the crisis began, would link up with this group for the assault. The main carrier strike group built around HMS Hermes and HMS Invincible pushed directly south towards the Falklands.

The First Assault South Georgia, 21–26 April 1982
The British assault on South Georgia began on 21 April with small special forces deployments to scout defensive positions on the island, it was initially delayed a day due to fear of a nearby Argentinian submarine the ARA Santa Fe, so the Taskforce waited a day to be reinforced by another British frigate which had anti submarine capacity in Lynx helicopters. Once the new anti submarine capacity was formed, the task force decide the first step in invading the island would be to take out the submarine threat, and therefore a large helicopter hunt began.
The Santa Fe submarine after hours of searching was located to the north-west of the island by a Wessex helicopter from HMS Antrim. It was engaged by multiple helicopters Wessex, Lynx, and Wasp aircraft from several ships and struck by AS.12 missiles, Mk 46 torpedoes, and depth charges. Heavily damaged, the submarine was forced to limp into Grytviken harbour where she was abandoned by her crew on the jetty.
With the submarine neutralised, the decision was taken to launch the ground assault immediately despite the main Royal Marine company being stationed 200 miles away out of harm’s reach. The assault force was instead assembled from the SAS soldiers and a small detachment of Marines already aboard the warships. At 14:45 on 25 April, SAS troops and Marines were airlifted onto the island by helicopter, landing south of Grytviken in low ground, while naval gunfire from HMS Antrim and HMS Plymouth smashed into Argentine positions along Brown Mountain Ridge aimed initially to demoralise rather than cause mass casualties.

HMS Antrim then steamed directly into the harbour, bringing her guns to bear at close range on the Argentine garrison. Faced with naval gunfire, the threat of SAS and Marine assault troops closing from the south, and the loss of their submarine, the Argentine garrison commander at Grytviken, Captain Alfredo Astiz, surrendered. British troops landed, consolidated, and the following day pushed north to liberate Leith Harbour the second settlement on the island completing the recapture of South Georgia with minimal casualties on either side. The task force quickly rejoined the main carrier strike group on 29 April, which was by now pressing hard towards the Falkland Islands.
The Air and Sea War May 1982
Exclusion Zone and First Strikes 1 May
By early May, the British main task force had spent the best part of two weeks pushing south. Britain had already declared a 200-mile Total Exclusion Zone around the Falklands, warning that any aircraft or vessels within it would be regarded as hostile. Diplomacy had completely failed. On 1 May, British warships officially crossed into the exclusion zone, and the air war began immediately. RAF Vulcan bombers had already struck Stanley airfield on 1 May in Operation BLACK BUCK a 3,900-mile round trip from Ascension Island requiring 11 mid-air refuellings, the longest bombing raid in history at that time. Sea Harrier fighters from the two carriers then followed up with strafing and bombing runs on Argentine positions around Stanley and Goose Green, softening defences ahead of the anticipated ground campaign.
Argentina responded the same day by mobilising a large air armada approximately 40 combat aircraft along with two naval task groups moving from the north-west and another task group moving toward the south, in a pincer movement on the British fleet. On the same day British navy had deployed two submarines to the north in order to find the approaching carrier strike group which they failed to do, to the south there was more success as the southern Argentinian group was found and followed by a briths submarine called the cruiser, the southern task force was of particular concern due to featuring Argentina’s newest destroyers, both equipped with AM39 Exocet anti-ship missiles.

The Sinking of ARA General Belgrano 2 May
From the morning of 1 May, HMS Conqueror had been shadowing the southern Argentine task group, which was heading east at speed. The British task force commander, Rear Admiral Sandy Woodward, grew increasingly concerned that his fleet might be caught in a pincer : the Argentine carrier striking from the north and the southern surface group with its Exocets closing from the south, which could of occurred as early as the next morning at the tracked speeds they were moving at . During the night of 2 May, a British reconnaissance Harrier detected Argentine vessels to the north-west, confirming the carrier group’s approximate position and its potential to launch strikes within hours.

This potential devastating multi pronged assault sort Woodward to receive instant authorisation from London to sink one of the ships of the souther Argentine task group to avoid and break up this potential devastating pincer. The target was the cruiser ARA General Belgrano, the flagship of the group. Crucially, the Belgrano was at this point outside the declared Total Exclusion Zone a fact that would generate lasting controversy. However, she represented a direct and credible threat to the task force, and at 15:57 on 2 May HMS Conqueror the shadowing submarine fired three Mk 8 torpedoes. Two struck the Belgrano dead on, and the ship sank rapidly, claiming 323 Argentine lives the single greatest loss of life in the entire conflict. British military historians have claimed this was a legitimate target due to the threat within hours it posed to the British carrier strike group.
The effect on Argentine naval strategy was immediate and decisive. Upon learning of the Belgrano’s sinking, the entire Argentine surface fleet withdrew to coastal waters and did not venture out again for the rest of the war. The aircraft carrier ARA Veinticinco de Mayo never put to sea again. Britain had effectively achieved control of the South Atlantic with a single torpedo salvo.

HMS Sheffield 4 May
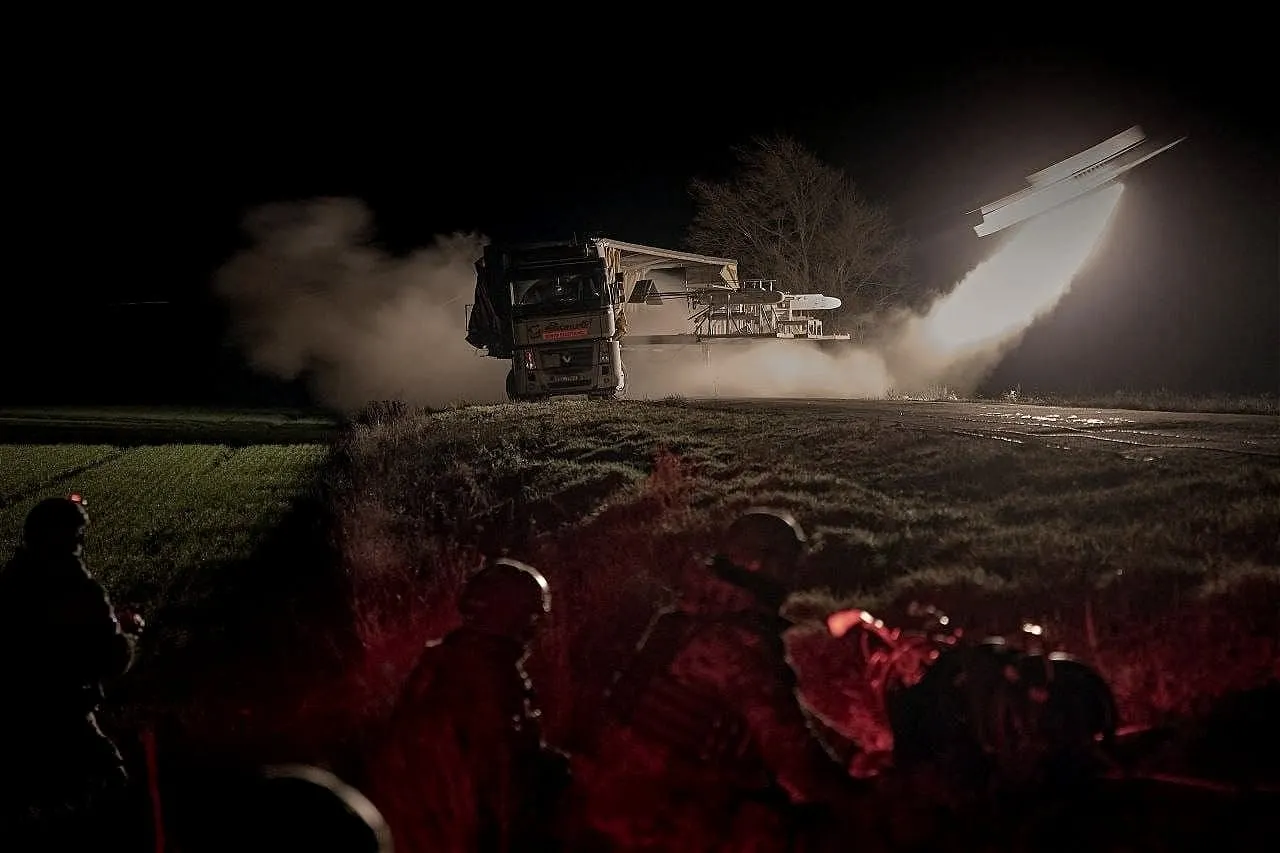
The fight was far from over despite the initial victories. Argentina possessed a fleet of modern, western-built combat aircraft and a small number of Super Etendard naval strike jets armed with the advanced French AM39 Exocet anti-ship missile a weapon the British had not faced in combat before. On the morning of 4 May, an Argentine Neptune maritime patrol aircraft located the British task force south-east of the Falklands. Two Super Etendards took off from Rio Grande airbase in Tierra del Fuego, flying at ultra-low level to avoid radar detection, and refuelling from a C-130 tanker along the way, heading to deal a devastating blow to the British navy.
The British task force had deployed its Type 42 destroyers HMS Sheffield and HMS Coventry approximately 20 kilometres ahead of the carrier group as an early-warning radar picket. As the two Argentine advanced fighters closed in their locked eyes on the unaware HMS Sheffield. Sheffield detected the incoming raid, but due to her use of a satellite communications system that blocked her radar at the critical moment, the ship’s crew had no warning. At 10:03, an Exocet missile struck Sheffield amidships. The resulting fire burned for six hours; with the ship’s firefighting systems knocked out, she was abandoned. Twenty sailors were killed and twenty-six wounded. Sheffield was the first Royal Navy warship lost to enemy action since the Second World War.
The next couple days of the conflict involved constant naval bombardment of the Falkland Islands by British carrier launched missiles and naval gunfire, and occasional dog fights between the two forces, the British decided to revaluate their stature after the loss of Sheffield and turned their eyes on invading the Falklands itself.

Pebble Island Raid 14/15 May
The decision to start the invasion started to take action on the 10th of may:
On 10 May British planners decided to figure out what best part of the island was to attack, quickly it was established a forced would have to be landed on the eastern island and the Stanley capital would have to be captured which held the majority of Argentine forces, which therefore meant an assault had to come through the middle of the islands along the strait , HMS Alacrity was sent alone through the Falkland Sound the strait between the two main islands at night, to confirm whether Argentina had mined the channel in order to determine if it was viable to launch a large naval force their. The frigate passed through without incident, confirming the preferred landing site at San Carlos Bay was accessible. One significant obstacle remained: a small Argentine airstrip on Pebble Island, off the northern coast of West Falkland, which was believed to be operating Pucara ground-attack aircraft capable of devastating any amphibious landing force.

The decision was made to destroy the airbase using the same SAS squadron that had helped retake South Georgia. On 13 May, a small SAS reconnaissance team was inserted onto Pebble Island to observe Argentine positions. On the evening of 14 May, HMS Hermes detached from the main fleet with two escorting warships and closed to within helicopter range of the island. At 02:00 on 15 May, Sea King helicopters carried approximately 45 men of D Squadron SAS onto the island. Four assault teams fanned out one to establish a mortar position to the south, two assault groups moving north for the main attack, and one to provide a blocking position. Naval gunfire from the escorting warships provided fire support on cue.
The assault lasted barely 30 minutes. The SAS overwhelmed the Argentine defenders, destroyed all six Pucara ground-attack aircraft on the strip along with additional aircraft and fuel and ammunition stores. In a desperate move, the Argentine base commander detonated pre-placed demolition charges on further aircraft to prevent them falling into British hands, bringing the total aircraft destroyed to eleven. The runway was also cratered. By 07:30, the SAS had withdrawn five kilometres south and were extracted by Sea King helicopters. The raid neutralised the Pebble Island threat entirely.

Quickly after the securing of the Pebble Island and the Argentinian short range ground attack aircraft it was decided quickly the main assault of the Falkland Island itself should be begun, with troops moved into position closer to the Island over the course of a week.
The Battle of San Carlos 21 May 1982
The Landings
The Argentine garrison defending the Falkland Islands was substantial an entire army group concentrated primarily around Stanley, with smaller detachments entrenched at Goose Green and elsewhere across the islands, including at San Carlos settlement itself. The British landing plan, Operation SUTTON, chose San Carlos Bay on the western coast of East Falkland a location that surprised Argentine commanders who had expected a direct assault on Stanley.
The beginning of the assault:
On 20 May, the amphibious strike groups moved in under cover of fog. British special forces were deployed ahead of the main force: one team destroyed an Argentine observation post at Fanning Head, which commanded the approach to the bay, while another element moved to screen Goose Green and prevent the Argentine garrison there from reinforcing the landing beaches. At 04:00 on 21 May, 2 Para landed unopposed at San Carlos Bay to the south. A substantial Argentine Marine detachment defending the inner bay fought a determined rearguard action as they attempted to withdraw, downing two British helicopters before being forced out by an advancing 3 Para detachment, over the course of the next 5 days amphibious landing ships and transport ships came into the bay and dropped off thousands of British soldiers, whilst the remaining warships to escort them were deployed outside the bay in the Strait with the carrier strike group being positioned closer to the north of the Island.

Bomb Alley The Air Attacks
By the morning of 21 May the main British landing force had come ashore and consolidated its beachhead, but the Argentine Air Force responded with ferocity with a large costly air campaign which lasted over five costly days. Waves of Dagger and A-4 Skyhawk fighters conducted repeated low-level attack runs against both the beachhead and the Royal Navy ships supporting the operation in the bay and in the Falkland Sound a stretch of water that quickly earned the name Bomb Alley.
In a deliberate and effective tactical decision, British warships were positioned outside San Carlos Bay itself, in the Sound, to draw Argentine air attacks away from the vulnerable amphibious ships and the troops coming ashore. On the morning of 21 May alone, two warships were hit. By the afternoon, a British frigate HMS Ardent which was patrolling south to the south of San Carlos was targeted by multiple Argentine jets one of which was shot down by a Sea Harrier but two 1,000-pound bombs struck the ship, knocking out her power and guns. Attacked again later that afternoon by a further five aircraft, she took two more bomb hits and was left burning so severely she had to be abandoned, sinking overnight. HMS Ardent was lost with 22 sailors killed. By the end of that first day of landings, approximately 30 British sailors had been killed and an estimated 10 Argentine aircraft had been shot down roughly a quarter of those committed to the day’s attacks.
22 May brought a brief pause due to weather. The attacks resumed on 23 May with four Argentine fighters targeting a trio of British warships south of Fanning Head. Two jets were shot down, but two managed to place bombs on their targets. The bombs failed to detonate on impact Argentine pilots had been releasing them at too low an altitude for the fuses to arm but one detonated later during a Royal Navy bomb disposal attempt, sinking HMS Antelope with the loss of two men marking two warships sunk in the space of 3 days.
25th of May marked the Argentine National Day, and the Argentine Air Force committed almost its entire remaining operational strength to the continued air assault of the San Carlos surrounding strait. Aware of the date’s significance and anticipating a maximum effort, the British brought their carrier group closer inshore to shorten Sea Harrier sortie times, and positioned Type 42 destroyers to the north-west of San Carlos as an air defence screen. Initially this worked, with the screening ships shooting down two incoming Argentine jets. Then the air defence screen fell apart: the radar systems on two of the Type 42 destroyers malfunctioned simultaneously. A swarm of A-4 Skyhawks broke through and hit HMS Coventry with three bombs; she capsized and sank within minutes with the loss of 19 men. Shortly after, Argentine Super Etendards using Exocet missiles attacked the main carrier group further north, striking the requisitioned container ship Atlantic Conveyor, which was carrying vital Chinook and Wessex heavy-lift helicopters. She burned and sank, killing 12 crew members including her captain, Ian North. Crucially, 10 of the 12 Chinook helicopters aboard were destroyed a loss that would force the majority of British troops to make the advance later in the campaign on foot.

The Battle of San Carlos effectively ended on 25 May. Over four days of intensive air attack, Argentina had lost more than 20 aircraft but had succeeded in sinking four British ships HMS Ardent, Antelope, Coventry, and Atlantic Conveyor and damaging six others. Despite these losses, the British military had firmly established itself ashore at San Carlos and was now ready to push east towards Stanley.
The Ground War
Battle of Goose Green 28–29 May 1982
After 3 days of consolidating after the costly air war in the Falklans strait, and bringing supplies and logistics inland Britain launched its main assault of the Falkland islands itself, whilst consolidating its positions in the other western islands which were largely undefended.
The first major ground engagement of the campaign was launched south from the San Carlos bridgehead by 2nd Battalion, The Parachute Regiment. Approximately 500 paratroopers assaulted a well-prepared Argentine defensive position at Darwin and Goose Green, held by a garrison that ultimately numbered over 1,600 troops more than three times their own strength. The battle lasted more than 36 hours of intense fighting across open, exposed ground.
During the assault, Lieutenant Colonel Herbert ‘H’ Jones, commanding 2 Para, was killed leading a charge against entrenched Argentine positions near Darwin. He was posthumously awarded the Victoria Cross one of only two awarded during the entire conflict. Despite his loss, the battalion pressed on, eventually driving the Argentine force from its defensive positions, capturing the airfield, and encircling the remaining garrison in Goose Green town, forcing their surrender the following morning. Over 1,200 Argentine prisoners were taken by British forces, a key military victory in securing the main assaults flank.

The Advance on Stanley
Following the victory to the south at Goose Green, more British forces arrived and a plan was devised to drive east and assault Stanley which by now held well over 10,000 Argentine troops and had become the main capitulation point of the whole campaign, including approximately 5,000 front-line combat soldiers entrenched in fortified positions on the ring of hills to its west. The plan called for a multi pronged set up, 3 Para battalion to advance on the northern axis, while 2 Para along with the Scots Guards and Welsh Guards of 5 Infantry Brigade would be moved south by sea around the coast to Fitzroy and Bluff Cove, to attack from the south, pincering the Argentinians into the landmass at the top of the Falkland Islands where Stanley city was, with them defending the hills west of it.

Due to the loss of so many Chinook helicopters on Atlantic Conveyor, most of the advance had to be made on foot across boggy, featureless East Falkland terrain in brutal winter conditions the famous Royal Marine ‘yomp.’ The one remaining serviceable Chinook Bravo November flew an extraordinary number of missions throughout the campaign, lifting loads far in excess of its official limits.
Between June 3rd and 8th large amount of paratroopers and marines were airlifted south of Stanley city to the towns of Fitzroy and Bluff cove which sat several kilometres south of massive Argentines defensive positions on top of mountains west of Stanley city. Tragedy struck during this southward redeployment when, on 8 June, the landing ships RFA Sir Galahad and Sir Tristram which carried large deployments of troops which could not be ferried in helicopter and therefore had to be transferred by sea into Fitroy bay, were caught in daylight at Fitzroy by Argentine A-4 Skyhawks while still loaded with troops. Sir Galahad was packed with men of the 1st Welsh Guards who had not yet disembarked. Three jets struck the ship with bombs, causing catastrophic fires. Forty-eight Welsh Guardsmen and crew were killed and many more were severely burned. The attack on Sir Galahad became one of the defining tragedies of the war, and the iconic images of soldiers being rescued from the burning ship were broadcast worldwide.
By 10 June, British forces had cleared much of central and eastern East Falklands. Seven battalions were in position to the North, West and South of Stanleys territory, ready for the final large land assault of the campaign.
The Assault on Stanley 11–14 June 1982
Phase One: The Western Hills Night of 11/12 June
Stanley was protected to its west by a series of commanding hills Mount Harriet, Two Sisters, and Mount Longdon all heavily fortified and held by Argentine infantry, and represented the outer belt of the Argentinian defence. The British attack plan called for a coordinated night assault on all three simultaneously, exploiting British superiority in night-vision equipment and close-quarter fighting training.
The assault was launched on the night of the 11th of June, with the first two positions Mount Harriet and Two Sisters falling within four hours with relatively light casualties five British soldiers killed between both engagements as 42 Commando and 45 Commando Royal Marines stormed and cleared the Argentine positions.
However it was not complete smooth sailing the third crucial objective to the north Mount Longdon was a far more brutal affair. Attacked by 3 Para, the mountain’s steep and complex terrain allowed the Argentine 7th Infantry Regiment to channel and pin down the attacking force with interlocking machine-gun fire. B Company became stuck on the western slopes, with 4 Platoon pinned down and unable to advance leading to hours of gruelling combat up heightened terrain. Realising that the assault was stuck and the British forces were taking heavily losses Sergeant Ian McKay, identifying the machine-gun positions holding his platoon in place, led a small group in a direct charge against the fortified positions. He fought his way through multiple Argentine bunkers almost single-handedly before being cut down by machine-gun fire. His actions broke the deadlock and allowed 4 Platoon to resume the advance. McKay was posthumously awarded the Victoria Cross. The battle for Longdon lasted through the night and into the following afternoon until the Argentinian defenders were eventually pushed out, with 23 paratroopers killed and 35 wounded the heaviest British casualties of any single battle in the war. Argentine losses on Longdon were 31 killed.

Phase Two: The Final Assault Night of 13/14 June.
After the fall of the vital outside layer of the Argentinian defensive positions the British set their eyes on the second outer layer:
The Welsh Guards and Gurkha Rifles were brought forward for the second phase, targeting Mount Tumbledown and Mount William, as British artillery opened a heavy bombardment across all Argentine positions around Stanley.
Mount Tumbledown was held by the Argentine 5th Marine Battalion the most capable and highly motivated unit in the entire Argentine garrison. Aware of the danger, the British first feinted with a diversionary attack to its south to draw Argentine attention, before launching the main assault of 2nd Battalion Scots Guards against the main defences. An hour into the assault, the Scots Guards became pinned down in fierce close-quarter fighting, and a multi-hour battle ensued before sustained artillery support and relentless pressure eventually broke the Argentine Marine position. Nine Scots Guards were killed. The time taken to seize Tumbledown meant the parallel assault on Mount William was delayed until nearly dawn.
To the north, 2 Para’s A Company launched an assault on Wireless Ridge to encircle Stanley from the north. The attack was overwhelming in its firepower Scorpion and Scimitar armoured vehicles, field artillery, naval gunfire from HMS Ambuscade, and air support all combined to drive the Argentine defenders from the ridge with minimal delay. 2 Para secured the high ground. Shortly afterwards, members of 2 Para observed an Argentine counter-attack forming below them; it was rapidly broken up. With Wireless Ridge lost, the entire western defensive line around Stanley had collapsed. Hundreds of Argentine troops abandoned their positions on the surrounding hills and streamed back into the town, closely pursued by British artillery fire.

The Gurkhas of 1st/7th Gurkha Rifles advanced on Mount William to find it empty the defenders had already fled. British forces now commanded all the high ground around Stanley from every direction.
Sensing a rout, the British pushed the advantage immediately. 2 Para, supported by armoured vehicles, launched a frontal assault directly towards Stanley. 40 Commando pressed onto Stanley Hill, the last occupied high ground position. Welsh Guards conducted an air assault completing the encirclement. By the evening of 13 June, Argentine forces had completely retreated into the town itself, surrounded on all sides by British naval, air, and ground forces.
The Surrender — 14 June 1982
In the early hours of 14 June 1982, General Mario Menendez, the Argentine Military Governor of the Falklands, accepted that his position was hopeless. With all commanding high ground lost, his troops demoralised and running low on supplies, and British forces closing on the town from every direction, further resistance would only prolong the inevitable. At 21:00 GMT on 14 June, Menendez signed the instrument of surrender at Government House the same building where the invasion had begun 74 days earlier. General Jeremy Moore accepted the surrender on behalf of the United Kingdom. All Argentine forces across East and West Falkland were ordered to lay down their arms. 11,313 Argentine prisoners were taken, all subsequently repatriated to Argentina within weeks.

The Falklands War was over, the British victory was achieved.
RULE BRITANNIA-WM
Losses
United Kingdom: 255 killed, 665 wounded.
Argentina: 649 killed (including 323 in the sinking of ARA General Belgrano), 1,657 wounded, 11,313 taken prisoner.
Six British ships were sunk: HMS Sheffield, HMS Ardent, HMS Antelope, HMS Coventry, RFA Sir Galahad, and the Atlantic Conveyor. Argentina lost approximately 75 aircraft across all services.
Back in London, the victory saved Margaret Thatcher’s government politically, leading to a landslide Conservative victory in the 1983 General Election. In Buenos Aires, General Galtieri resigned on 17 June 1982, and the humiliation of defeat accelerated the collapse of the military junta. Argentina held its first free democratic elections in October 1983.